Sod installation is a game-changer for homeowners who want an instant, lush lawn. However, timing and proper installation techniques are critical to ensure the sod takes root and grows healthy and thick.
In this guide, we will discuss when and how to install sod to achieve the best results.
Timing
The best time to install sod depends on several factors, including geographical location, climate, and the specific grass type. As a general rule, the best time to lay sod is in the early fall or spring when the soil temperatures are moderate.
With that being said, sod can be laid at any time of year. If you put sod down in summer, you will have to make sure it gets adequate water. Read this publication from Texas A&M if you need help selecting a type of sod.
Preparing the Soil
Before installing sod, preparation of the soil is crucial. Start by removing any existing grass, weeds, and debris from the area where the new sod will be installed.
Loosen the soil with a rake or rototiller to a depth of 4-6 inches, then level it to ensure a smooth and even surface. The soil should be loose and free of large clumps or rocks that will hinder the roots’ growth.
Consider getting your soil tested so you know exactly what your soil needs to thrive.

Slow-nitrogen releasing lawn fertilizer is best.
Lawn Fertilization
Once the soil has been prepared, it’s time to fertilize it. Adding a slow-release fertilizer to the soil will help provide necessary nutrients to the new sod as it establishes its root system.
It’s a good idea to perform a soil test to determine the pH levels of the soil, allowing you to choose the appropriate type of fertilizer that suits the specific grass type you’re installing.
Before laying the sod, evenly spread the fertilizer over the prepared soil and gently rake it in. Lawn fertilization is one of our specialties. Take a look at our lawn fertilization service page.
Installing Sod
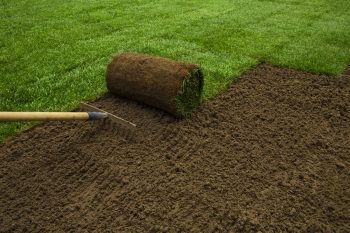
Now that the soil is ready, it’s time to install the sod. Start by unrolling the first section of sod against the longest straight edge of the lawn, such as a sidewalk or driveway.
Minimize the edges by laying the sod tightly together while avoiding overlapping or leaving gaps. Use a sharp utility knife to cut any strips or pieces of sod that need to be trimmed to fit around obstacles such as sprinkler heads and trees.
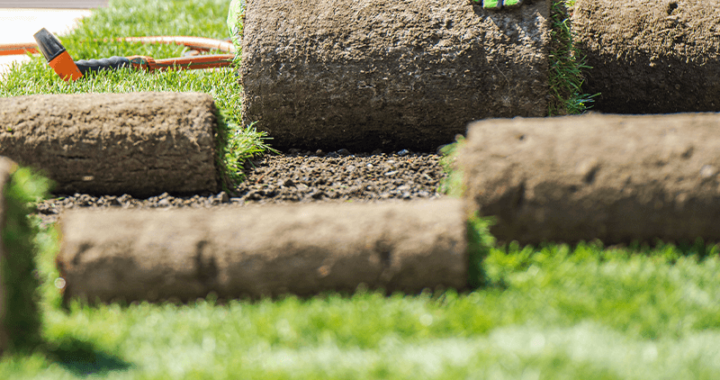
Once you have installed the first row of sod, work your way towards the opposite end of the lawn, unrolling and laying each section of sod firmly and tightly against the previous row.
Butt the edges of each section of sod together, but avoid overlapping or leaving gaps. When laying the last row of sod, use a straight edge or mason’s line to ensure the lawn’s final edge is straight and even.
Seems like a lot of work doesn’t it? In Grapevine, TX contact us today and we’ll install the sod for you.
Complete Long Island Sod Services found here.
Rolling and Watering

Unroll sod evenly.
Once you have installed the sod, it’s essential to roll it. A weighted lawn roller will help ensure that the sod makes good contact with the soil and eliminate any air pockets.
Roll the entire surface of the lawn, particularly the edges and areas where the sod overlaps. After rolling, it’s time to water the lawn.
Gently saturate the sod with water, giving it enough water to soak through to the root system, but not enough to cause runoff or standing water.
The soil should be kept evenly moist for the first few weeks after installation, allowing the roots to establish firmly.
Post-Installation Care
After installing the sod, proper care and maintenance are crucial to ensure the lawn stays healthy and lush. It’s recommended to avoid heavy foot traffic on the new sod for at least the first two to three weeks to allow the roots to establish and the sod to knit together. Don’t mow the lawn until the roots have established, usually about 2 to 3 weeks after installation. Gradually ease into mowing the new sod, avoiding removing more than one-third of its length at a time.
Let us do the hard work for you. Check out our lawn care service page.
It is recommended to fertilize the new sod 60 days after installation. Make sure to follow the instructions on the fertilizer packaging, taking into account the grass type you installed. Avoid over-fertilizing, as it can damage the lawn’s root system.
Read this pdf published by Texas A&M University and learn the steps involved in successful turfgrass establishment.

Healthy, thick lawn.
Conclusion
Installing sod will provide homeowners with an instant and beautiful lawn.
By following these guidelines you will ensure that it will take root and grow healthy and lush.
With the right attention, your new sod lawn will provide years of beauty and homeowner satisfaction.

